Matt Porter, Fashion Educator at UNT
Season 12 Episode 1202 | 26m 46sVideo has Closed Captions
Discover what can make men’s pants fit perfectly and make a fashion statement.
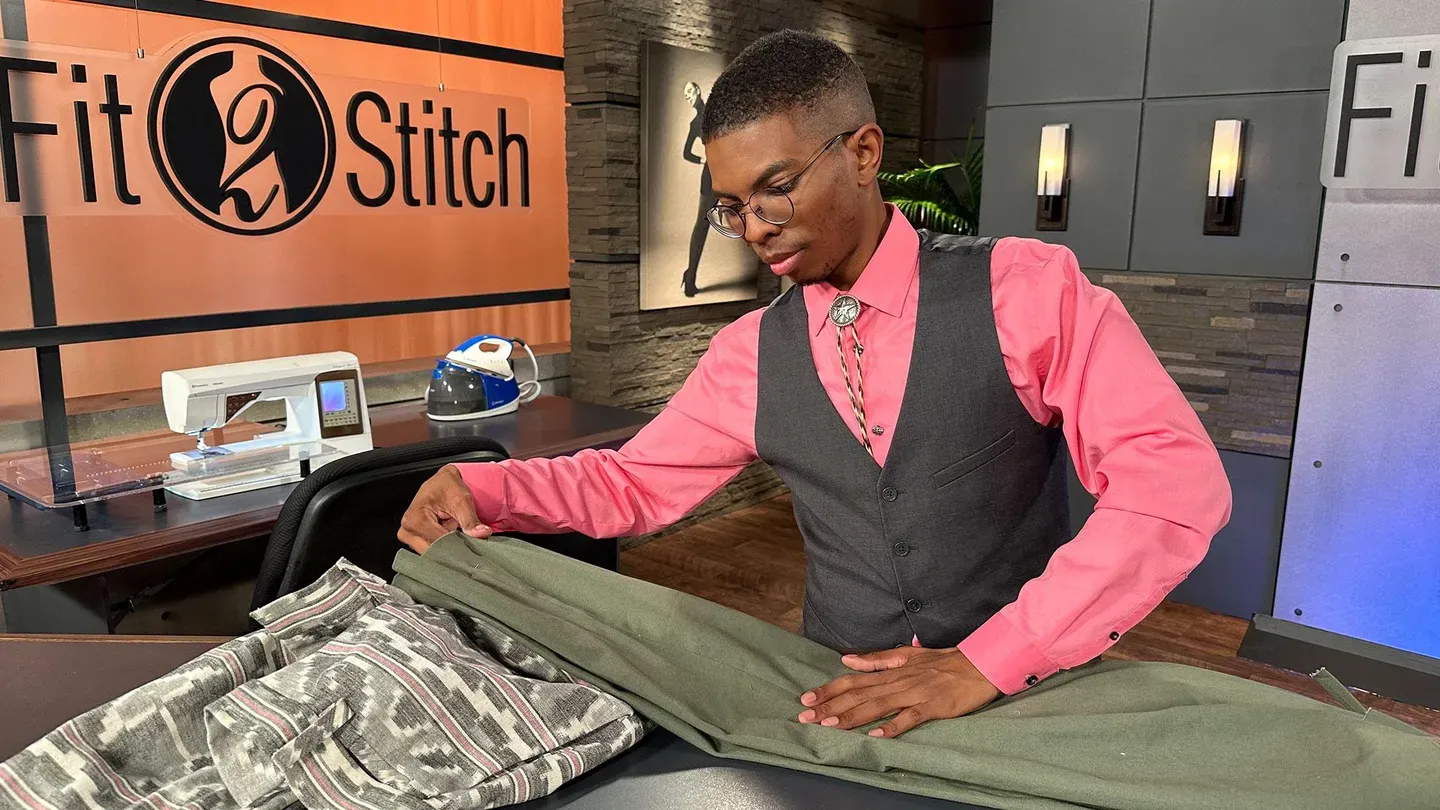
Matt Porter is an educator and researcher with a design specialty in menswear and custom tailoring. In this episode, Matt gives a step-by-step lesson in the construction of men’s pants. Matt is an experienced and fun teacher. With particular attention to the construction of the waistband, he shares the meticulous details that can make men’s pants fit perfectly and make a fashion statement.
Problems with Closed Captions? Closed Captioning Feedback
Problems with Closed Captions? Closed Captioning Feedback
Fit 2 Stitch is presented by your local public television station.
Distributed nationally by American Public Television
Matt Porter, Fashion Educator at UNT
Season 12 Episode 1202 | 26m 46sVideo has Closed Captions
Matt Porter is an educator and researcher with a design specialty in menswear and custom tailoring. In this episode, Matt gives a step-by-step lesson in the construction of men’s pants. Matt is an experienced and fun teacher. With particular attention to the construction of the waistband, he shares the meticulous details that can make men’s pants fit perfectly and make a fashion statement.
Problems with Closed Captions? Closed Captioning Feedback
How to Watch Fit 2 Stitch
Fit 2 Stitch is available to stream on pbs.org and the free PBS App, available on iPhone, Apple TV, Android TV, Android smartphones, Amazon Fire TV, Amazon Fire Tablet, Roku, Samsung Smart TV, and Vizio.
Providing Support for PBS.org
Learn Moreabout PBS online sponsorshipPeggy Sagers: I often hear the question, "Can a beginner sew men's pants?"
Men's pants are typically more involved and complex than women's.
As long as you know how to measure fabric and operate a sewing machine, you can learn to sew a pair of pants.
And today, we're going to make it simple and clear.
Matthew Porter, a professor at University of North Texas, will show us the best sequence of men's pants, all today on "Fit 2 Stitch."
♪♪♪ ♪♪♪ announcer: "Fit 2 Stitch" is made possible by Kai Scissors.
♪♪♪ Reliable Corporation.
♪♪♪ Plano Sewing Center.
♪♪♪ Elliott Berman Textiles.
♪♪♪ Bennos Buttons.
♪♪♪ And Clutch Nails.
♪♪♪ Peggy: For those of us who have ever altered a pair of men's pants, what we know is there's numerous pieces in that band that actually make alterations easier, but the pieces are a little bit more complex.
So we've got an expert on to show us.
We're gonna bring Matthew here today.
He teaches at University of North Texas, and one of the classes that you teach is men's pants.
Matthew Porter: Menswear Construction, yes.
Peggy: That's awesome.
And we could put 'em on women's, yes?
Matthew: Absolutely.
Any of these techniques that we show you here today for these men's pants can be applied to women's pants as well, but they're traditionally seen in men's garments.
Peggy: They are, and it's because they almost are expected to be altered-- is that fair?
Matthew: Yes, so a lot of men's pants typically have room to be altered or allow leeway to be altered.
If you think buying suits off the rack, sometimes they come unhemmed.
They are intended to have some tailoring done to them a lot of the times, yeah.
Peggy: Yeah, and you know it all.
Will you share your secrets?
Matthew: Absolutely.
So today, I'm specifically going to be talking about the waistband.
So there's two traditional types of waistband.
So, first off, here, we have a simple waistband.
It's just folded over, and it's a great way to finish pants, and, typically, it's the preferred method for finishing pants.
Peggy: And it's all one piece?
The whole entire waistband is one piece?
Matthew: Absolutely, just folded over, and you'll see this on jeans.
Peggy: And that's kind of what is done on women's too, is one piece.
And that's why it's hard to alter because it's one piece.
Matthew: Sometimes.
So what we do see sometimes is a seam down the back of the waistband to allow for-- yes, down the center back, to allow for some alterations, but not all the time.
Sometimes, it is just one continuous piece.
Peggy: Okay, versus-- Matthew: Versus here, we have what's known as a waistband curtaining technique.
That is traditionally seen in more tailored garments.
It's a little bit more involved, but you can see the difference.
So this one looks a little bit more simple, more off the rack.
This one looks a little bit more polished and has a little bit more pieces.
Peggy: It's nice.
This looks rich.
It does look really rich, especially where you've contrasted the fabric, and I know you did that for us to see, but a lot of times it is contrasted.
Matthew: Absolutely, so even by contrasting the fabric, you can add an element of interest to the design as well.
Peggy: It's so nice looking.
Matthew: So, with this particular waistband, with the waistband curtaining, you'll first of all, see-- just have a feel at how this waistband feels versus this one.
Peggy: Oh, it's so much thicker.
Matthew: Definitely a lot sturdier.
Peggy: You can tell there's only two layers there, where you can really grab a hold of that.
Matthew: Absolutely, so this one is typically just finished with regular fusible interfacing.
This has just a medium-body interfacing, but this one has a little bit different structure on the interior to allow for a more stable waistband.
Peggy: All the layers.
Matthew: Right.
Peggy: Very nice.
And you're gonna show us how?
Matthew: Absolutely, so a couple of things that I wanna show you first of all is what we're going to apply the pants to.
So, the waistband in this technique is going to be applied in a little bit of a different manner than the traditional waistband, okay?
So, right here, I have some pants in the midst of being completed, and I want you to notice real quick that I do have the belt loops already attached.
They're going to get caught in the top of the waistband, similar to your traditional waistband as well, but one thing with the curtained waistband is we're not going to yet finish our fly assembly, because in order to get these nice, clean-finished edges, we're going to have to wait until the waistband is installed in order to do that, yes.
Peggy: Interesting.
Matthew: So in order to do that, you're going to need a couple of pieces.
So you mentioned earlier about alterations.
So I wanna draw your attention real quick to right down center back.
You'll notice that our seam allowance is a little bit larger than on our side seams.
So this is what's known as an inlay.
So that is that portion of the pants that are going to allow you to expand them as the person grows or if you need to make some alterations.
That's typically seen almost exclusively in men's pants.
Peggy: And it looks like it's a good inch and a half?
Matthew: This right here has an inch on both sides, so you can expand the waist up to 2 inches, but you probably wanna stay between an inch and an inch and a half just the the proportions of the garment.
Peggy: Sure, that makes sense.
Otherwise, everything becomes too big or too small or out of proportion.
Matthew: Correct.
So you have to keep that in mind when doing the waistband as well because if you think about expanding the waist of the pants, the waistband also needs to expand to accommodate.
Peggy: Makes sense.
Matthew: So here are going to be the pieces that you're going to need in order to construct your waistband curtaining.
So it seems like quite a lot of pieces at first, but really and truly, it comes together quite nicely.
Peggy: I'm so excited to learn this because the men's pants look so nice, and I think they keep your stomach in.
Maybe that's why they do 'em for men's pants but, you know, they just seem to hold really firm and nice.
Matthew: And I'm going to tell you one of the reasons why that is as we get to our components here.
So, first off, I've gone ahead and chalked out my waistband.
So with our men's pants, we're typically gonna have that in two separate waistband pieces.
So I've gone ahead and chalked out my waistband, which is we're gonna have a right waistband and a left waistband, because we have our fly assembly here, and remember that the shield is going to be on one side, which is larger than the fly facing, which is going to fold back over on itself.
So you're going to have to calculate those measurements based on each side, and you can do this on a paper pattern, or I usually will just chalk it straight onto the fabric so that it's as square as possible.
Peggy: It's a 1:1 ratio?
Matthew: Correct.
Peggy: No easing?
Matthew: No easing.
You will have to add in a couple of things such as we mentioned earlier.
You have to account for adding your inlay and your seam allowances as well because we're measuring off of our finished pants.
Peggy: Sure.
Matthew: Okay, so I've gone ahead and chalked that out.
The other components that you're going to need is you're going to need each of these components for both sides of your waistband.
So the first thing I'm going to need are my curtaining pieces.
So this is just a regular piece of pocketing, and you can do this out of a lining fabric, a silesia, a calico, anything you really want to.
Peggy: Hundred percent cotton?
Matthew: Absolutely.
I prefer to use more sturdy fabrics like a regular cotton as well.
Peggy: Okay.
Matthew: So this is what's going to be my top curtain piece, so we can see here, I have the stripe going along the top, but you're also going to have a lower curtain piece, which is going to be that second half too, and you can make these the same or different fabrics.
It just really depends.
Peggy: I like how you've got 'em all different.
That looks pretty cool.
Matthew: It's a little bit easier to understand when it's a little bit different.
So those are our first two pieces.
So remember you're going to need those each for your right and your left.
So I have my left pieces here.
The second things that you're going to need are going to be your interfacing, and you're going to need two types of interfacing.
So the first one is going to be known as wigan.
It's just kind of like a lightweight cotton-- or cotton canvasing that goes in between the waistband, that's going to help stabilize it, but what's giving the waistband that stability and that structure is another interfacing that's called Ban-Roll, and it has a bunch of different applications, but it really works great for the waistband, as it provides a lot of structure.
Peggy: And it won't bend, which is why it's called Ban-Roll, right?
It doesn't go this way.
Matthew: It's not as susceptible to wrinkling.
It really holds-- it's almost like rebar.
It holds its shape quite nicely, almost like a boning for a waistband.
And then the last thing you're going to need, it's either just another strip of your pocketing fabric or I usually will just use a strip of muslin and I have this cut to 2 inches thick.
Peggy: Okay, so now, are all these pieces-- I notice there are some different lengths.
Are they all-- Matthew: Great question.
So with the Ban-Roll on each side-- so you're gonna have a left and right piece of your Ban-Roll-- the Ban-Roll is just going to be the same length as each of your waistbands, so I have my right Ban-Roll piece here, and you can see that it's the same length as my waistband here.
It has my inlay in it.
It has the same seam allowance.
It just is at the same finish size, so this Ban-Roll's at a 1 1/2-inch.
My waistband is finishing at 1 1/2 inches.
Peggy: Got it.
Matthew: The curtaining pieces are going to be cut a little bit shorter, as they are getting tucked under additional folds.
So they don't need to go all the way to the edge of our fabric.
So I just cut those maybe an inch or two into the edge that's going to conceal them.
Peggy: So you don't have to have an exact measurement, as long as they're shorter than.
Matthew: Just a little bit shorter, just to reduce a little bit of that bulk.
And then the muslin here is just cut on bias, and it's going to be eventually used to cover your wigan, and the wigan is cut to the same length as your curtaining pieces.
So the Ban-Roll goes to the waistband.
The wigan goes to your curtaining pieces.
Peggy: And this is bias.
That's really surprising to me.
I guess so that we'll flex around the waist?
Matthew: Yeah, it just provides it with a little bit more of stretch and comfort as it goes around the waist so it doesn't get too rigid.
Peggy: Sure.
Matthew: So the first thing that we're going to do is-- the first step is going to be with your wigan pieces.
So you're going to take your wigan pieces and that muslin that we just mentioned, and you're just going to create a little bit of a shield to prevent the edge of that wigan from fraying out.
So what I've done is I've just folded my muslin in half and then I've just done a chainstitch across that in order to secure it.
Peggy: That's the bottom of your waistband now?
Matthew: That's going to be on the interior.
This is going to go in between, so this is the bottom, and this is going to get caught in the top, okay?
So we just have that finished with that.
Peggy: And do you just mark 'em left and right?
Matthew: Yes, I always keep it marked left and right because this curtaining is kind of like a lining and you really don't want to accidentally get confused with which side is which because it actually is going to be reversed when you're installing it.
Peggy: Got it.
Matthew: So just-- I always will mark them left and right somehow.
Maybe less conspicuously.
Peggy: Yeah, no, no, no.
I love that just so we're aware.
One pin or two pins, or something.
Matthew: Something like that, just so that you will know and won't forget which side, 'cause otherwise they won't match up.
Peggy: Well, and I think it's-- I think there are so many times where I've sewn where I think, "Oh, I'll remember."
And then, sure enough, you know, 20 minutes later, when I'm picking it, yeah, so that's a great tip.
Matthew: So this is going to be step one, and like you mentioned, keep those designated with your left and your right.
The next thing is you're going to take your upper and your lower curtaining for the left and right sides as well, and then you're just going to stitch those together lengthwise at half of an inch.
So you can see that I have my right curtaining and my left curtaining, and on the reverse side, they're just secured at half of an inch.
The lower curtaining is actually going to be folded, just so that the clean finish is that edge.
The top is going to get caught in the seam.
Peggy: Because if we go back to the pant, that's what's gonna be shown-- down, Matthew: Correct, yes, absolutely, and again-- marked some way.
It's a great finish.
It is a little bit involved but perfectly doable.
Peggy: It's so pretty.
I mean, it's really nice.
I just love it, looking inside of those pants.
They look so good.
Matthew: Absolutely.
So after you have your curtaining pieces attached, the next step is going to be to take your pre-assembled wigan and attach it to your two curtaining pieces, and how that's going to look is you're going to make sure that you align the top of the wigan with the top of the curtaining, and that just gets secured with another stitch through the seam allowance, not through all the layers, only through the seam allowance to hold it into place.
Peggy: Oh, so the inside layers, kind of, are being attached.
Matthew: Correct.
The wigan's going right on that seam allowance so it kind of creates one unit.
Peggy: It's very nice.
Matthew: And that's done the same again for your left and your right side.
Peggy: Do you ever wonder who created this concept?
I mean, it's amazing, because they're so well done.
They're just very well done.
Matthew: For sure.
All of these different interfacings play a important role into the structure of this, and, typically, with craft supplies and craft sewing stores, you only get that one fusible type, but there's many more options that allow for some design versatility.
Peggy: It's really true.
Matthew: So once you have that complete, then you're going to attach these two pieces together, okay?
So this is a step, again, where I want to emphasize you know which side is your left and your right, because you can easily get it confused to where you flip them when you've attached the seams at the side.
So, always pay attention to your left and your right.
Peggy: I appreciate your acknowledging that, because we're all out there going, "Yup, been there, done that."
Matthew: So I've sewn the left and the right curtaining pieces together, okay?
So this is going to be the center back seam.
Peggy: Look at that, how good that looks.
Matthew: And it just flows.
And you can see how we have quite a wide amount here, so that's our inlay.
So that's what allows it to expand and be adjusted with the pants as well.
So it's that inch plus a little bit extra seam allowance just for security, okay?
So once you have that installed, the next step is kind of optional, but it does allow for-- Peggy: Ooh, it's pretty though.
Matthew: --a cleaner finish.
So, on the interior of that, I just like to give my corners a little bit of a miter just so that when it's installed you don't accidentally see any of those folds peeking out, but that's totally optional.
Peggy: I've seen them in a lot of pants, though, they are folded diagonal like that.
Matthew: Little bit of a design detail, not necessary.
Be a little bit extra if you decide to be.
Peggy: Yeah, looks great.
Matthew: And so you'll see that this is going to be the curtaining that's going to now be installed to our waistband.
Just make sure that when you're attaching these pieces that your top and your lower are as straight and seamless as possible, and that just we wanna also make sure that your curtaining is dipping down below your interfacing, correct.
So the next portion is going to be how you're going to actually take all of this work that you've done and install it into your pant.
Peggy: Yay, it's install time.
Matthew: Yes, so I'm gonna go ahead and pin that so I also should mention that I have my Ban-Roll sewn together in the same way, where we have that inlay stitched down at center back, our left and our right side, and I've also gone ahead and done the same with our waistband.
Peggy: I don't know if you're gonna say this when you go to attach.
Will you talk to me about my belt loops a little bit?
Matthew: Yes, so we'll talk about that right now, actually, as I go to pin this on.
Peggy: Okay, because I know for width and placement, sometimes, it matters.
There's reasons why belt loops are where they are and what they do.
Matthew: Yes, so, with the belt loops, there's a couple of different conventions for where to attach them.
I typically will err on the side of going at the center where your darts would normally be, and then approximately 3/4 of an inch down from the top edge of your pants edge, but you can kind of place them as you desire and the amount that you would like to place them.
Peggy: But say, let's say, if they were talking tradition, five belt loops?
Matthew: Five or sometimes you'll see the six, with the double at center back, correct.
Peggy: Two at center back, one at the side-- one at each side, and then one in the front-- one in each front, and I notice you're using-- is it fair?-- I'm gonna say a 1/2-inch seam allowance?
Matthew: Yes, I'm attaching the waistband at 1/2 of an inch seam allowance.
Peggy: And is that pretty typical in men's pants?
Matthew: It's industry standard for most garments, yes.
So I have the waistband pinned on.
You just wanna make sure that all of your seams are walking, your center front and your side seams as well.
And let's go ahead and take that over to the machine.
Peggy: Ah, this is the most fun part.
I shouldn't say "most fun," because now you get to see that all that work is actually going to do something.
Is that fair?
Matthew: Absolutely, so we're going to start off by just attaching the waistband to the pants, and I'm gonna go ahead and stitch that at a regular 1/2-inch seam allowance.
So remember that we haven't sewn our fly shield down yet, so the waistband goes all the way over to cover that.
Now, as you're sewing, just make sure everything underneath is lying flat.
Peggy: And you're going right through the belt loop?
Matthew: It's going to stitch over the belt loops as you sew, yes.
Peggy: Got it.
I love watching this.
I love watching someone sew.
I think it's awesome.
You learn so much by watching somebody else.
Matthew: We're approaching that center back inlay.
Okay, so that's half of it right there.
Peggy: And your seams align so you're in good shape, but technically, even if they-- I know you're a professor-- but even if they weren't exact, it would be okay, wouldn't it?
You can say no.
It's okay.
Matthew: It's not the best.
Peggy: So you start at center back when you line it up, and then you work both ways?
Matthew: I work just going one way.
Peggy: You work going one, okay.
Matthew: As I mentioned, it's quite a few layers.
Peggy: And so you just keep those layers and just make sure they're not shifting and you keep 'em in shape?
Matthew: Right, so all of the pockets and the belt loops have all been basted down just to avoid them from shifting as I sew.
Peggy: You've done this before.
That looked way too easy.
You made that look easy.
Matthew: Okay, so we're gonna go ahead and give that a snip.
Remove our pins-- which you should, I've been told, remove them as you sew.
Peggy: I don't either, Matthew.
It's okay.
Matthew: So we're going to now take our Ban-Roll, and it has been assembled.
We wanna make sure that we have our left and our right sides oriented properly, and you're just going to give that a baste, 'cause it's going to fold up on itself, and this doesn't have to be an exact measurement, just-- Peggy: We won't quote your students on that, okay.
Matthew: Well, it's just a baste.
It won't be visible anyway.
Peggy: I see.
It's just to attach it.
Matthew: It's just to make sure that that Ban-Roll isn't sliding around.
Peggy: Sure.
Matthew: Now we'll remove that, and I'm gonna go ahead and give that a press, and you'll see that when I press that upwards, it'll get tucked into the waistband.
Peggy: So you actually sew it toward the-- kind of almost down, but then you're pressing it up toward the band, I see.
Matthew: You press it upwards so that it actually gets encased in the waistband, yes.
So you're just pressing that seam allowance up.
Matthew: And this can be a little bit tricky, as that Ban-Roll really doesn't want to move around.
Peggy: And so the Ban-Roll really isn't bent at all.
It literally is stitched in place and then pulled up.
The band's pulled up around it.
Matthew: Yeah, absolutely.
You can baste it in place with-- by machine, which we did here, or you can hand baste it in, which is a little bit more preferable, as you have a little bit more control when you're attaching it, just so that it doesn't warp, but machine basting definitely works.
Peggy: I can see what's gonna happen.
This is kind of exciting.
Matthew: So, once you have that pressed, we're going to now attach the curtaining.
You're gonna go right sides together with the waistband, and we're going to apply that at 1/4 of an inch.
Now, based on how I draft my patterns, I will give the top of my actual waistband a 3/ 8-inch seam allowance, just so that you have a nice little buffer so that that curtaining doesn't accidentally poke through.
Peggy: As opposed to?
Matthew: If it was just a 1/ 4-inch, you would have to understitch or something like that, but that-- giving the waistband that extra-- Peggy: Three-eighths gives you a little more space.
Matthew: --gives you a little bit more space, yes.
So this is going to have a lining piece that's going to eventually come over it, so it ends a little bit shorter.
And then, on the opposite side, it folds back on itself, but it is also a little bit shorter.
Right, so we can go ahead and look at the finished piece so we can see how this all turns out.
Peggy: You're right, there are a few pieces, but it's actually not that hard.
It's just strip by strip, step by step.
Matthew: Strip by strip, and layer it all together.
So, you can see that that shorter end that you mentioned gets tucked right underneath that beautiful lining piece and cleaner finishes that edge.
And then, as I mentioned, when you fold over that Ban-Roll, you have that nice little 1/8-of-an-inch buffer and finishes everything up, and the great thing about the Ban-Roll is as you're ironing that curtaining over, it gives you a nice, stiff, clean edge to press over so that it holds its shape, does a lot of work.
Peggy: So, question for you.
If you're buying a pattern and it doesn't have these pieces in them, you're kind of reliant upon the pattern.
Matthew: You will be somewhat reliant on the pattern, but everything is based on the measurements of the initial waistband, and it's either shortening or the same measurements as the waistband.
Peggy: So, talk to me just briefly about finishing off these belt loops.
Matthew: Right, so the belt loops have been stitched down at their 3/4-inch marker.
Peggy: And they are done that way?
Matthew: Yes, and then you'll just-- after you have your waistband completely installed, then you go in and finish your belt loops by just folding down that extra 1/4 of an inch and either topstitching it or you can hand tack it, and then the last thing that you'll wanna also do is finish your fly front and add your-- top stitch.
Peggy: And you topstitch the fly.
So the topstitching of the fly is done after the waistband is put on?
Matthew: In this method, yeah.
Peggy: Wow, that's just so unique.
Thank you.
It's so nice to have men's pants taught by a man.
Matthew: Wonderful.
It was a pleasure being here.
Thanks, Peggy.
Peggy: Thank you, Matt.
Those darn patterns, do we love them or hate them?
Next time on "Fit 2 Stitch," we'll learn to love those patterns.
The key is understanding them.
Barbara is back to show us flat pattern and drape, and the relationship between them.
Join us.
♪♪♪ ♪♪♪ ♪♪♪ ♪♪♪ announcer: "Fit 2 Stitch" is made possible by Kai Scissors.
♪♪♪ Reliable Corporation.
♪♪♪ Plano Sewing Center.
♪♪♪ Elliott Berman Textiles.
♪♪♪ Bennos Buttons.
♪♪♪ And Clutch Nails.
♪♪♪ announcer: To order a four-DVD set of "Fit 2 Stitch," series 12, please visit our website at fit2stitch.com.


Support for PBS provided by:
Fit 2 Stitch is presented by your local public television station.
Distributed nationally by American Public Television